Monday, July 24, 2017

Trimming Down the Shoulders

Something I’ve been happy to discover during this build is that Rob and the support team over at RS Props is fabulous.  Initially, I had contacted them about the problem with my kit containing two right inner forearms.  They were quick to respond and remedy things by arranging to send the correct left inner forearm right away.  As I was waiting on that forearm, well, that was around the time when I screwed up my shins. 

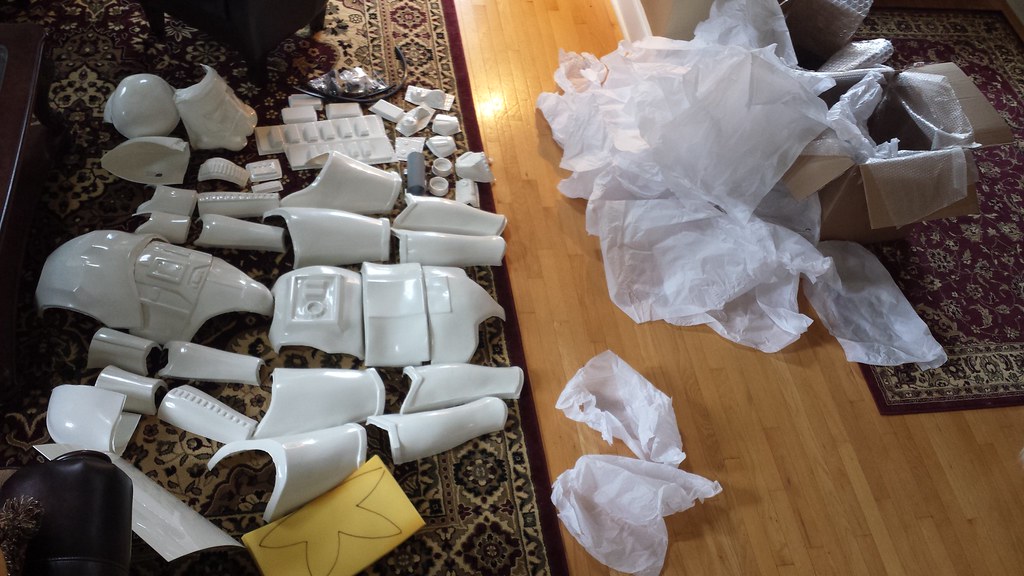
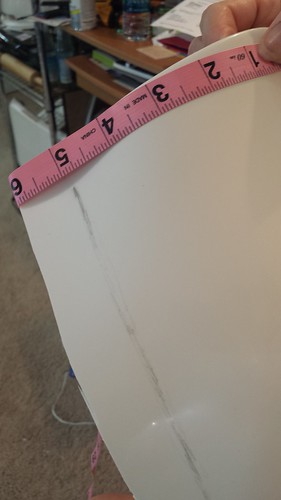
I had put my shins away and decided to work on my shoulder bells instead.  There is a pinched area of ABS at the top of the shoulder piece, and I emailed Rob to find out how to cut it down.  See?

29109428755_2e4b06b89b.jpg

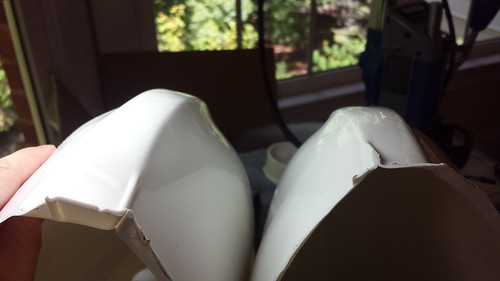
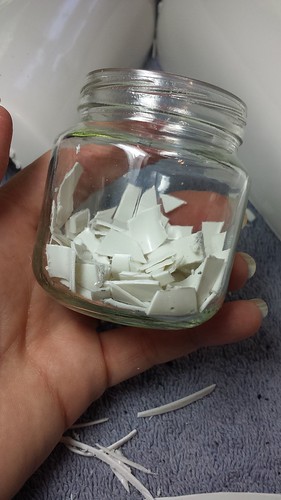
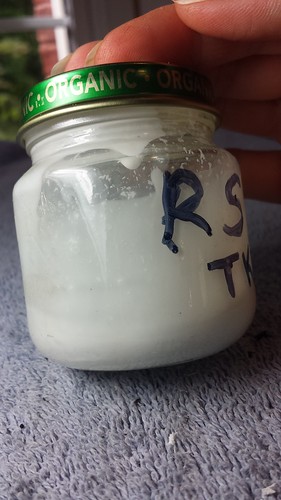
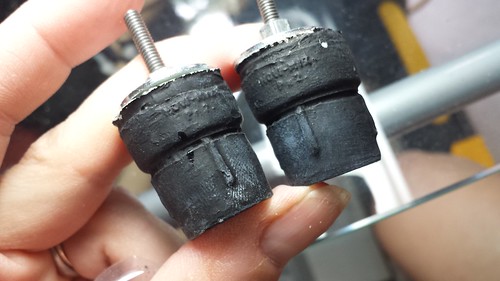
There are no cut lines on it, and I didn’t know where to start.  Also, I thought it would be a good idea to ask about ordering an extra set of shoulder straps for my kit.  I’ve seen them crack on more than one set of armor (although not necessarily RS armor), so it’s something I wanted to have on hand as backup.  At this time, I decided to tell Rob about how I’d butchered the shins.  Admitting my mistake to him was humbling, to say the least.  Again, I was mortified that I’d made such a stupid error.   Here’s an example of what my shins had been hacked down to:

29004442002_b8ddc49919.jpg

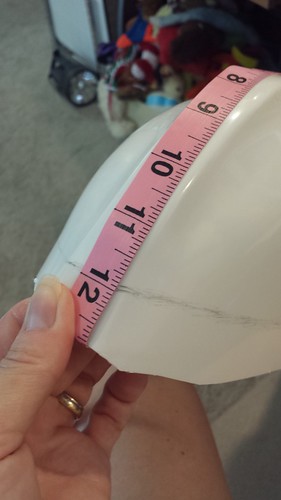
Rob emailed me back very quickly with measurements and photos of how to trim the shoulder bells.  (For all of you following along, it should be 12" from the bottom of the spine to the trim, then 5" from the edge of the spine to the trim.)  

28490853773_9bd99af325.jpg29004439772_e6a3603482.jpg


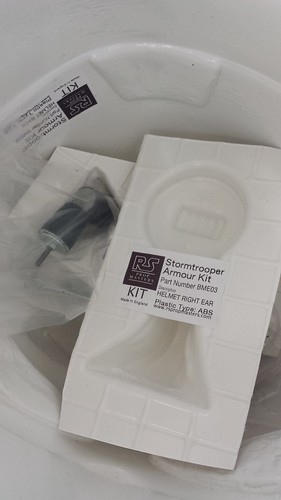
Then he told me that he would have everything- shoulder straps, left inner forearm, and two sets of shins- ready to send out the next day.  I was confused because he hadn’t mentioned the cost for it all, and I hadn’t submitted any payment.  I became concerned at this point.  Frustrated, I figured that I would just pay whatever he told me because even if I couldn’t afford it, I still needed it.  Oh well.  I asked him once more how much to pay for everything and braced for the reply. 

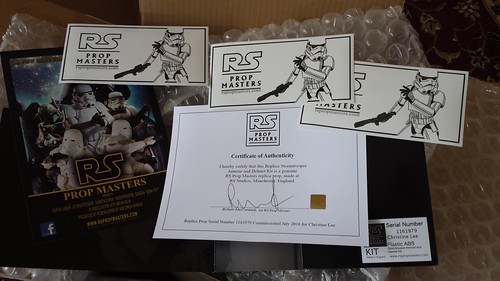
I was extremely surprised by the response.  Rob told me that he was happy to send it all out to me for no charge.   He said it was because they want to support their clients with their TK kits, that the people at RS Props are fans first and foremost, and that it’s not all about the money to them.  If I hadn’t been sitting in my chair when I read that email, I think I would have fallen onto the floor.  Talk about amazing customer service!!!

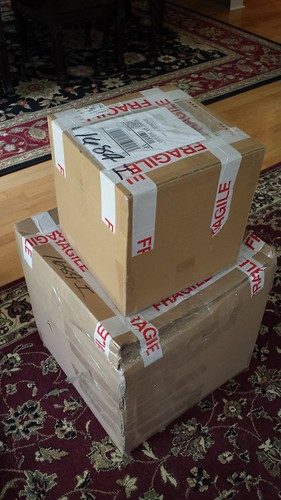
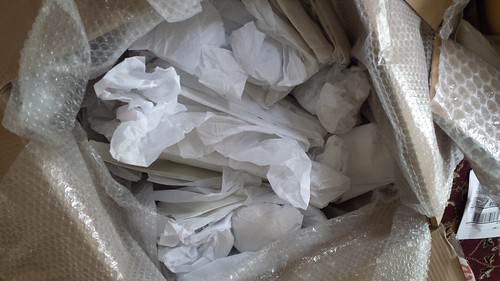
Everything arrived to me safely two days later.  That’s two days from the UK to my home here in Georgia.  So flippin’ fast! 

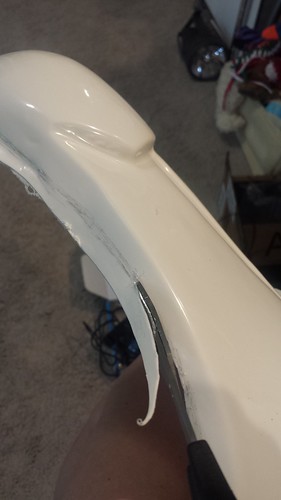
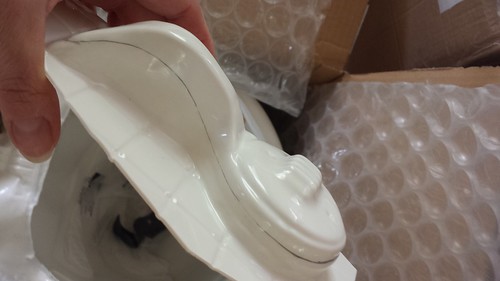
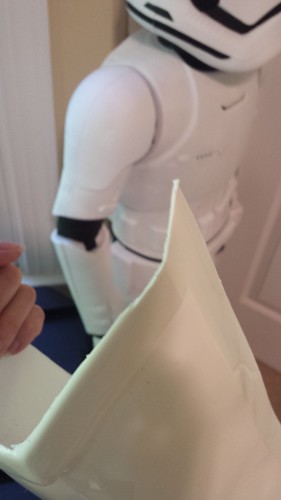
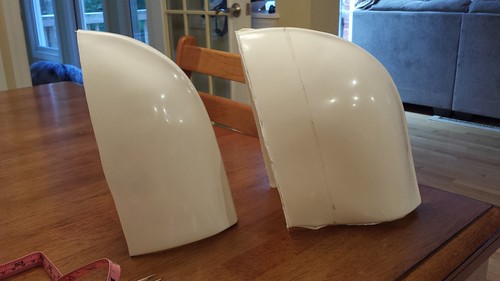
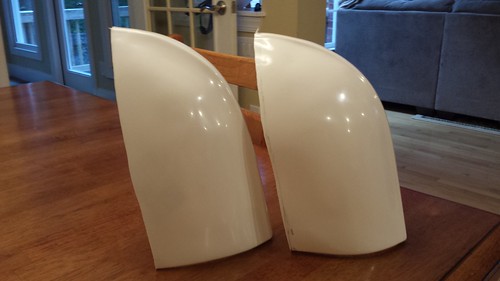
Moving along, I trimmed down my shoulder bells.  You can see how much needed to be removed.  This was before I sanded them smooth, but you get the idea here.

29032235061_cd5e9dba34.jpg29076944546_6436a80010.jpg

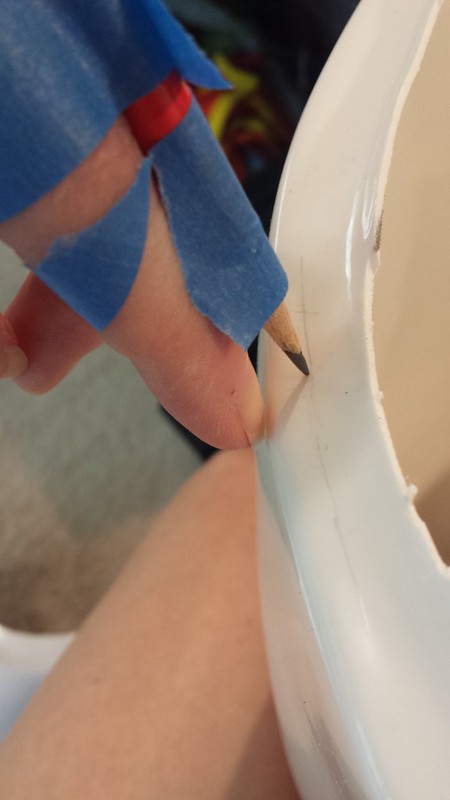
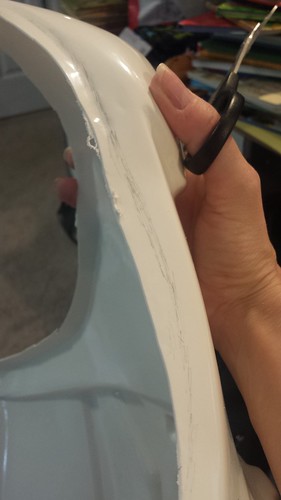
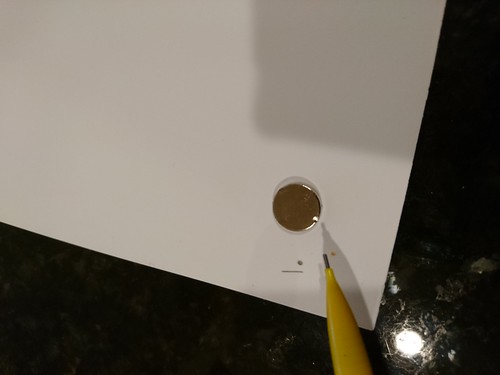
And now I’m making all my returns about 6mm wide.  I’m using the super high-tech process called pencil-taped-to-my-finger.  I don’t remember where I saw it first used, but it helps to create a fairly consistent line to trace the return before cutting.

28490854323_fd9bb334bf_c.jpg

Making ABS Paste (cheap and easy!)

Something I learned from building my ATA lid is that it’s really handy to have some ABS paste on hand to use at a moment’s notice.  And I never did.  I’m avoiding this hassle by being proactive and making the stuff NOW.

A few weeks ago, I had some minor surgery on my jaw, which left me in a state where I couldn’t eat anything solid.  I ended up eating my share of baby food (lost a lot of weight, too), and I saved the jars.  Empty cleaned glass baby food jars have a gazillion uses!  One way to use them is to store ABS paste.   Keeping the paste in an air-tight glass jar ensures that it will last for a very long time.

28282626653_099ab617ea.jpg

I first did some minor trimming on different areas of the armor in order to gather some scraps, making sure to not use any ABS that had pencil marks on it.  Don’t want to alter the color in any way at all.

28282627163_dbc43e046d.jpg28282626883_9525d09d22.jpg

I cut the ABS into tiny pieces with some tin snips (easier than using Lexan scissors), and put them into the jar.

28282626353_343de0e709.jpg

I labeled the jar with the armor maker, because I expect to have an ATA kit here in a few months.  I don’t want to mix or confuse which ABS paste to use on what armor.

28282626103_d47740c173.jpg

I happen to have a bottle of Pure Acetone on hand from Sally Beauty, but any kind of pure acetone will work just fine.  I poured some in, and stirred it all up with a coffee stirrer.  How much to pour?  Good question!  I poured enough in to not quite entirely cover up the pieces.  I sealed it up, gave it a good shake, and left it alone.

28282625863_3df9562edb.jpg

A few hours later, the acetone has melted a good part of the ABS, but it’s still too thin.  I stirred it again, sealed it, shook it up, and left it for a few more hours.

28897709775_7f7bae1440.jpg

And voila, ABS paste!

28822590591_2ddff8cbfa.jpg

It should be completely smooth.  If it’s not, leave it, and give it some more time to cook.  If it’s too thin (I prefer mine to be the consistency of play-dough), leave the lid open and stir.  Acetone evaporates quickly, and your ABS paste will thicken up in no time at all.  Too thick?  Add more acetone, stir, and wait.  Running low on ABS paste?  Dump more ABS scraps and some more acetone into the jar and repeat the process above.  Too much ABS paste?  What’s wrong with you?  You can never have too much ABS paste around. You never know when you’ll need it!

Building a Star Wars Stormtrooper (for the Smaller Trooper!)

Here I go with my official RS Props TK build for the Vertically Challenged (also known as This TK Comes in a Fun Size). For those of you interested, I am 5'4" and 108 lbs.  This is my very first armor build, so please feel free to jump in if you see me veering off course.  I’m setting this kit to Stunt, with my eyes on the prize of Centurion.

Since this build has many, many pages to it, I created an index so you don't have to wade through all of it if you don't want to.  If you want to see the unboxing of my RS Props kit, just keep reading . ****Let the build begin!****

But first, I'd like to share some Star Wars cookies I made with my son awhile back.  Because everyone loves cookies.  Wookiee cookies are awesome because they're chewie.  And yes, I know my TK cookies are not screen accurate.

28564184245_5c2dc46739.jpg

Everyone got a cookie?  Okay, good.  To the unboxing!

I want to mention how awesome of an experience it was to purchase a kit from RS Props.  They were professional, courteous, and always highly responsive to my (many) questions.  I received my kit in just a little over two weeks after I’d placed my initial order.  And that included shipping from the UK to the US!  I’ve heard that in the past, RS wasn’t always as responsive or easy to obtain armor from.   That was not my experience at all with them.  I’d buy another kit from them in a heartbeat.
27997298613_09067627eb.jpg
I ordered the 1.5mm ABS kit, and it’s lovely.  A nice milky creamy white, complete with all the bumps and lumps you’d expect from it.  Someone wrote that they appreciated it when armor has that 'craptastic' look, and I think now I understand what they were talking about.  A sanitized, perfectly smooth and symmetrical TK is not attractive to me at all.  Now, to open the big big box...  I felt a little dizzy with excitement at this point...

28580882926_526ea9d59e.jpg

First, the scent of the contents.  An invisible wave of the smell of fresh ABS hit me as I peeled away the bubble wrap.  I have found that I enjoy the smell of ABS now after building my first helmet.  It smells like...  victory!   :peace:

28580881846_998d76622d.jpg

Ah, this is going to take a while to unwrap it all...

27996437864_1ccce110f4_b.jpg

Twenty minutes later....  Yay!  It's all in great shape.  You don't need to see all the close up pics of every single piece, right?

28580886786_2b80b3bff1.jpg

Very surprised to see that every single piece is LABELED.  I've stared at so many armor builds that I think I know what's what, but it's still nice to see labels so I don't have to think quite as much.

27997297893_1ed75f9eed.jpg

Also surprised to see that the ears have been pre-marked for shaping.  I wish that an additional set of ears was included with this kit though.  That's okay, though.  I've already built one lid and have overcome my issues with the ears, so I think I'll be okay (knocking furiously on wood).

27996438604_2fe7c5d28f.jpg

Sweet swag pack inside, too.  Love the stickers!

I noticed that the color is different than my ATA lid, so here are a few side by side comparisons...

28613886695_11083ee1a9.jpg28534859861_4febf0dfb6.jpg
28613886165_50ac37ca36_c.jpg

The RS is more creamy white, the ATA is brighter.  The RS is way more bumpy/lumpy than the ATA, but also has more sharp features.  The RS lid is thinner, especially around the area of the mic tips.  I will most likely reinforce the inside of this thin area with some ABS paste.  I’ll also be plasti-dipping the innards, so that should increase the heft of the bucket overall.

And I could be wrong here (because the RS lid isn't finished yet), but the RS lid seems a bit larger than the ATA.  Verdict: I really like them, despite their differences!  Very glad to own them both.

If I have one grumble- and it's a very minor one- it's with the Hovi-Mic tips.  They are kind of sloppy.  You can see the casting of these is a bit of a mess.  You can also see someone's thumb print from the CA glue and extra CA glue drips on the side.  I'll probably repaint these.

28534859041_546129109e.jpg

And you can see the CA glue inside the mesh screen in the middle of the tips.  I'll poke these out with a toothpick.

28613885285_2e623da827.jpg

Again, this is a super minor grumble.  You can't really see most of the mic tips once they're installed anyhow.  These mic tips wouldn't have stopped me from buying this kit!  I'm a very happy soon-to-be trooper!

I'm going to need to do a LOT of modifications to this kit to get it to fit my 5'4", 108 lb frame.  I’m terrified of this whole process now, actually.  I’ve been re-reading Diana’s thread  http://www.whitearmor.net/forum/topic/25919-dianas-rs-props-build-anh-stunt which has loads of info for modding an RS kit to a more petite body type.

So.  Let's do this!

How to Build Magnetic Closures on Stormtrooper Shins

After being asked a gazillion times about how I built my magnetic shin closures, I've finally compiled everything from my TK build and p...