Tuesday, February 26, 2019

Building Internal Support for the EVA Foam T-21

I found a wooden dowel yesterday when I was helping my son build a balloon-powered car, which gave me an idea: the dowel was the perfect diameter to put perpendicularly into my aluminum tube.  I got a general idea of where I wanted to insert the dowel and marked the spot on the tube.


I drilled the hole with a Dremel, then I needed to figure out how to secure the dowel inside the aluminum tube.  Quick ideas that came to mind were e6000 and hot glue.  But I wanted a less messy and more robust way to glue things together.  Then I remembered that I had a few packs of Sugru hanging out in my craft chest!
I kneaded it into two parts.  One was a smaller bit that I inserted directly into the hole of the tube.  Then I pushed the wooden dowel inside.  From there, I simply molded the second half of Sugru into a shape that surrounded and supported the dowel against the aluminum tube.


Have you tried Sugru yet?  The stuff is awesome (expensive, though!).  It dries into a super strong rubber in 24 hours, and it bonds to everything.  I fixed a stress crack on a shelf inside our refrigerator door with Sugru two years ago, and it's still holding firm!


Attaching the wooden dowel to the aluminum tube might be over engineering things a bit, but at least I have peace of mind that the grip will not be an area of weakness in this blaster.

Monday, February 25, 2019

Assembling the EVA Foam for the T-21 Stock

A little more progress has been made today!  I'm so excited about this!  Or maybe it's just the fumes from the contact cement that is making me so ecstatic...
This is the foundation for the stock part of the T-21.  I was going to tackle this using my 1" thick sheet of EVA foam, but I realized that I couldn't slice it in half.  I need to put some sort of stabilizing material along the middle inside of the foam.  I brainstormed that it would be possible to stack up thinner layers of EVA foam instead.  I really like how dense the 8x10 sheets of 6mm craft foam are (found in 10 packs over at Amazon), so I decided to stack layers of that together to make my stock.

Each half is built of 8 sheets: four across, with two layers.  The sheets are glued together with contact cement in a staggered tile-pattern for extra strength.  The contact surfaces and adjoining edges are coated with contact cement.  See the pole in the pic below?  That's an old super-light aluminum golf club handle that will run inside the length of the stock.
46297228085_2dc16463c6_c.jpg

Next you can see how the first half is complete.  I placed the 1:1 template on top for scale.  There will be a channel carved out of the middle of the EVA stock to allow the aluminum pole to sit flush inside between the two layers.  This pole gives incredible strength to the foam and keeps the stock super lightweight.
33336211848_11cfc34e73_c.jpg

Second half coated with contact cement!
47159560502_0d97d7eb65_c.jpg

And done with the second half.  Considering how much stress that will be on the handle of the blaster, I will probably add an additional piece of pipe or something to the handle area behind the trigger.  I could cut another small section of aluminum pole from another old golf club, drill a hole in the main aluminum tube, and insert the small piece there- like in a T formation.  That should work, but if anyone out there has a better suggestion, please chime in!
46297227735_dd9e91bd26_c.jpg

I'm not concerned with the seams at all.  I know how to hide them, but they really won't be visible anyhow with all the greeblies that will be attached to this blaster.  The next step will involve rough cutting the blaster shape, carving the channel for the aluminum pole, then gluing both halves together with the pole inside.  Stay tuned!

Thursday, February 21, 2019

Fitting a Hero Stormtrooper Grappling Hook Box to Size

I've recently been diving headlong into a T-21 build, and it occurred to me that I've been neglecting to finish this kit. I am super close to finishing, and I suddenly realized that I have been actively avoiding working on it. Which got me thinking, "WHY???". It's been a dream of mine to have a Hero Luke suit, so what was going on??

I am sure that at least one of you out there knows the feeling when you feel that you just can't do something without screwing it up. And looking back at my progress, I see what caused me to stop dead in my tracks and make all sorts of excuses for why I didn't have time wasn't making this a priority. It was the grappling hook box. I had no idea as to how I was going to make it work on my kit. I was terrified that I was going to screw up a $300 prop (yes, I paid a little over that much for the box...). So with that, I just decided not to work. Period.

I'm crediting my husband for reminding me about my kit-in-progress. Actually, it was a comment he made last night as he looked at the floor of my nerd-room, which was covered with a 1:1 scale printout of a T-21, a large log of EVA foam, and various cutouts of styrene and PVC piping. Photo taken while the floor was still in its "clean" state...


"So how are you able to get to work on your stormtrooper with the floor covered in all this?" A nice reality check for sure. As I sat on the floor and looked around, I realized that there was nowhere to walk on the floor. I had (intentionally?) built an actual barrier to my TK with another project. And that's how projects never get finished!

Sooooo, today I decided to put away all the T-21 stuff and get back to work on my Hero build. And I'm committed to stay focused until I'm done!

I pulled out the grappling hook box and decided that the safest way to bend the side tabs would be with boiling water. I pulled out a heavy duty roasting pan and filled it with water. The extra large surface area allowed me to submerge the tabs and still give me lots of room left to work. Here you can see how straight things were before the hot water treatment:


I had to remove the round hook holster and left side belt clip, but this was an easy task- they were fixed on with e6000 (yay!). I used large paint stir sticks to help keep the tabs flat because I only wanted the bends to occur near the box, not on the tabs themselves. It took me about 30 minutes, but it worked!

 My grappling hook box now fits nicely along the kidney. Some before and after pics:


I still have to glue the left side belt hook and grappling hook circle back on. I'm going to give the whole thing a few days to dry out before I tackle that part. But at least this hurdle has been cleared, and I can now confidently wear the grappling hook box without it looking 'off'. I'm excited to finish this build now. Whew!

Oh, and my new Praetorian Blaster E-11 arrived in the mail a few days ago, and it is gorgeous! (I will probably do a little weathering to it to make it look a bit more battle-worn, but it's still beautiful.) The detail in that spring element alone is stunning!

I gave my Hyperfirm E-11 to my husband for his RS TK... which caused him to revert instantly back to a 10 year-old boy, running around the house with it, yelling, "Pew! Pew! Pew!". He can't wait to be a TK.

Wednesday, February 20, 2019

Foam and Plastic Feed Plate for the T-21

I think this part is called the feed plate?  I don't know anything about blasters in real life.  But it looks like a thing on a blaster, so, yay?

This is essentially several layers of EVA foam and 1/8" white plastic styrene.  The foam is glued together with contact cement, and the plastic bits are just dry fit into place to make sure things are coming together as they should.

So far, so good!  Now to tackle getting my pattern traced on to my 1" thick EVA foam.  Cutting that out will require use of my jigsaw... wish me luck!

Tuesday, February 19, 2019

Building a T-21 Light Repeating Blaster from EVA Foam

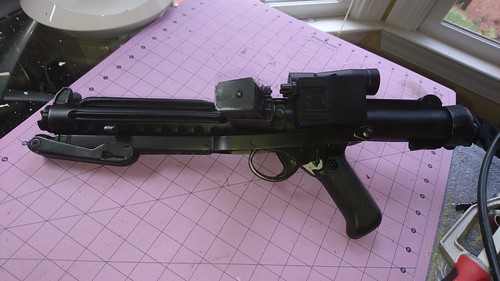
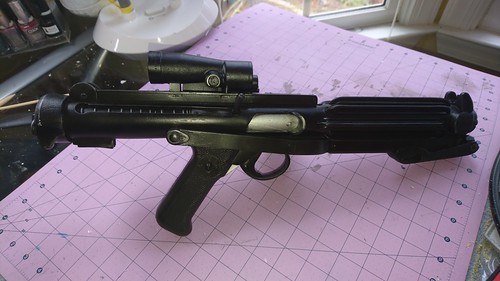
I've been in the process of prepping my T-21 build.  I see a big consideration for this BFG is weight.  I've been trying to brainstorm what might be good ways to lighten the load of the blaster.  The lighter it is, the more likely I'll bring it out trooping. 

What's a T-21?  It's a Big Freaking Gun, and it's totally badass.  Who wouldn't want to carry one of these?!

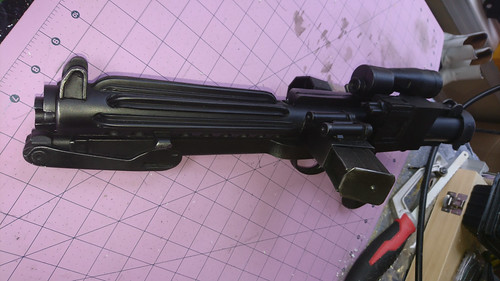
A Sandtrooper carrying a T-21 Light Repeating Blaster
Last year I scored some 4x8 sheets of high density EVA foam in various thicknesses from 1cm to 10cm thick.  I've been following Kamui Cosplay for a while now, and I've been (kind of) 
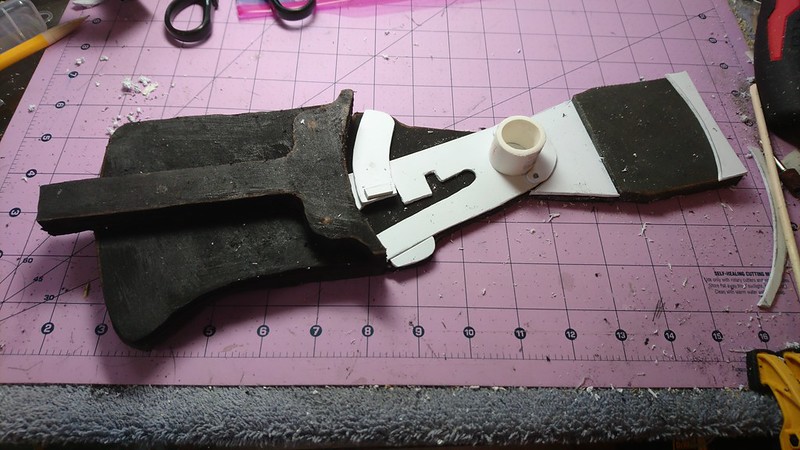
hoarding gathering foam for various costume projects.  I'm thinking that it would be quite possible to create the stock of the T-21 out of EVA foam instead of wood.  I could reinforce the center of it with a piece of aluminum tube (repurposed from a set of old golf clubs).  Last year I made a very strong sword with  EVA foam and aluminum tube in the middle, and it can take (and give) quite a beating!

If it can be done, an EVA foam stock would make the BFG a lot lighter, methinks.  I haven't seen that anyone has attempted this yet.  I asked the troopers over at www.whitearmor.net about this, and one person mentioned that weight distribution, not just weight itself, could be an issue. Making the stock of EVA foam and keeping the typical PVC tubing for the barrel would make the blaster pretty barrel-heavy.  Hmm.  I hadn't considered that issue before.

So this got me thinking about the PVC barrel.  In some of the T-21 builds I've read, I've seen people mention that if they could find a lighter PVC barrel component, they would take it.  The off-the-shelf stuff (schedule 40) is heavy.  Mainly I'm talking about the 3" and 2.5" pipes.  If I could find lighter sections of PVC, then a foam stock built from high-density EVA foam should work balance-wise.

Let it be known that in my area, the only PVC pipe I can find nearby in stores is schedule 40.  A little driving out of my area, and I found schedule 40 cell core PVC pipe at Lowes.  This is lighter than solid schedule 40, but I thought I could do better.  Some calling around to local hardware stores, and I found an Ace Hardware (about 20 minutes away) that was happy to special order a 10' length of 3" schedule 30 pipe for me.  At just $6 (including tax, free ship to store), it was worth buying if only to look at it.

And whaddya know...  the 3" schedule 30 pipe is super light- much lighter than the cell core PVC of the same diameter!  And it's the perfect size!

Next I decided to do some online searching for 2.5" schedule 30 pipe.  This is an odd size that I can't seem to find locally, either.  Lucky for me though, I located a length of 2.5" schedule 30 pipe online via Home Depot.  I should have that here in a few days.

I've got a spOOL68 resin kit for the T-21 on the way, but I think I'm also going to have a go at building the detail stuff in EVA foam as well.  I could always build two blasters- one from foam, and one from wood, and see which one I prefer.  (I wouldn't need two T-21's, so I could always sell the other.  :) )

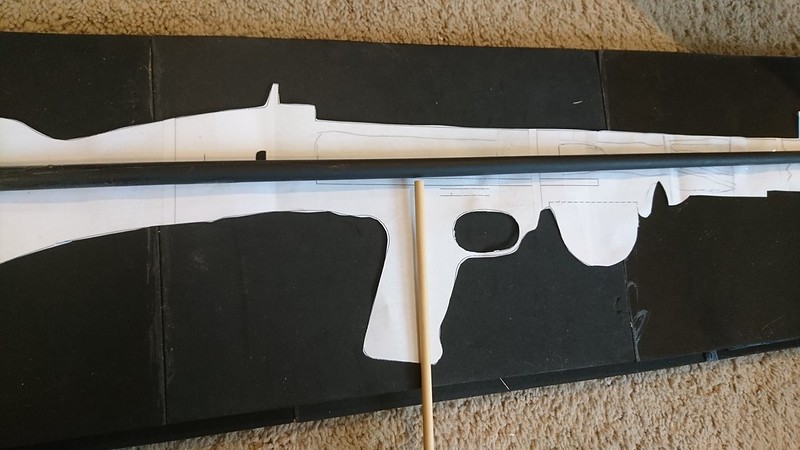
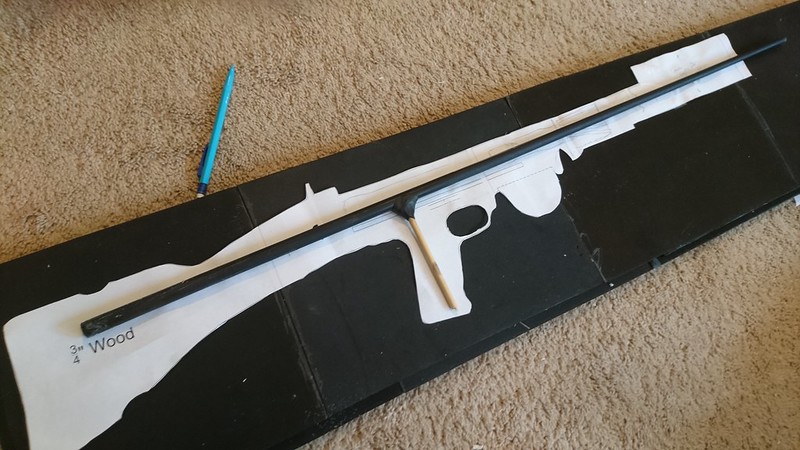
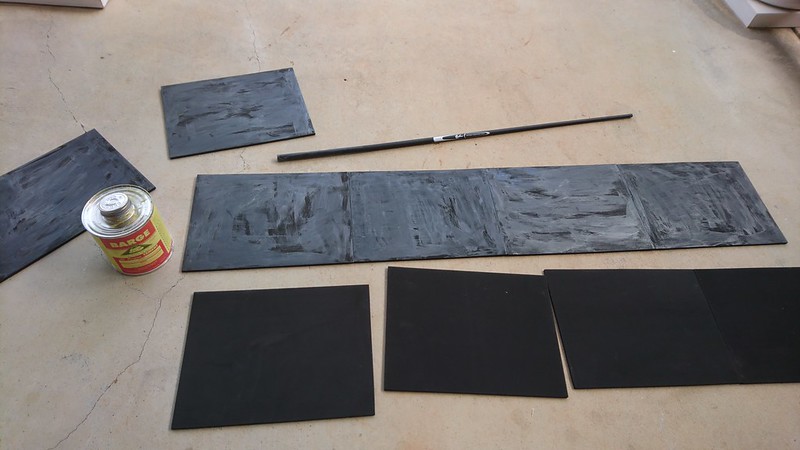
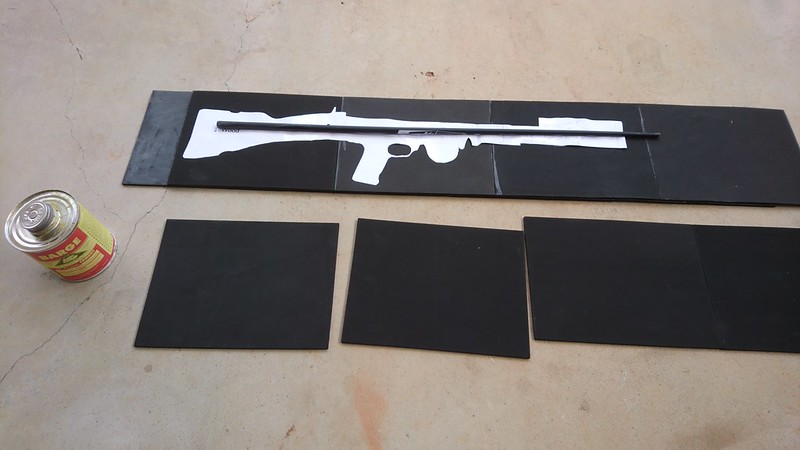
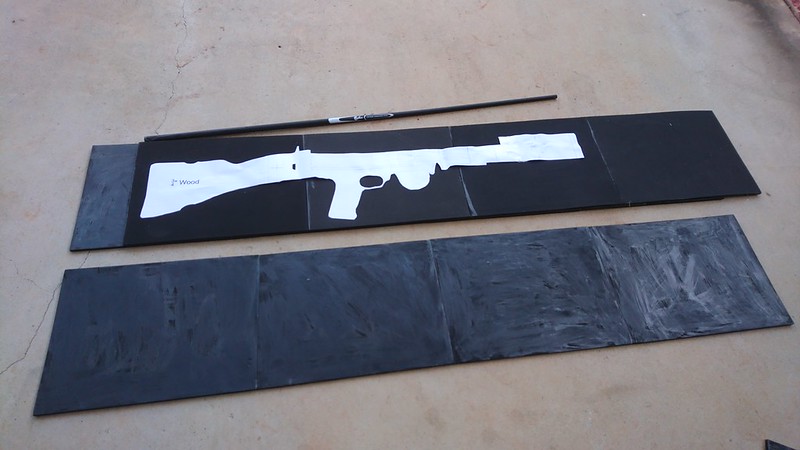
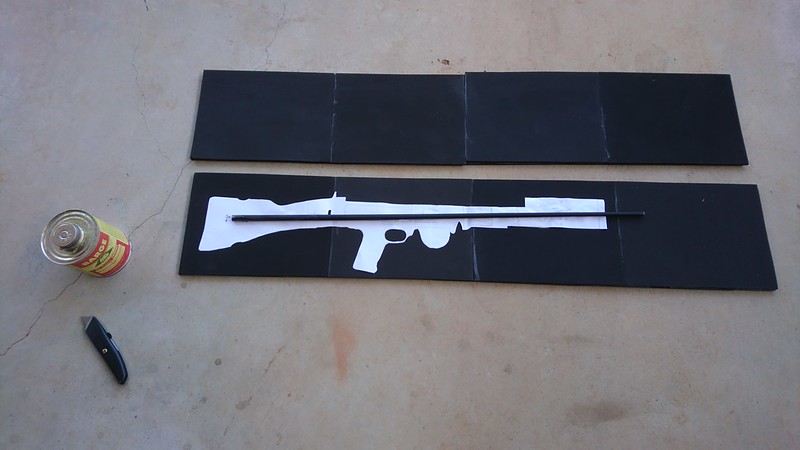
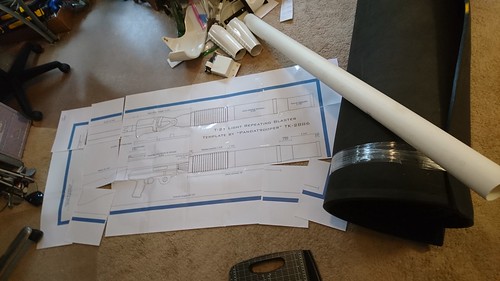
And with that, the EVA foam T-21 build begins.  First thing was to print out Pandatrooper's full size template, and tape it all together so I know what I'm getting into.

You can see one of the rolled up sheets of EVA foam along with the schedule 30 PVC pipe there on the right.  I've got more than enough material to make at least three T-21 blasters!

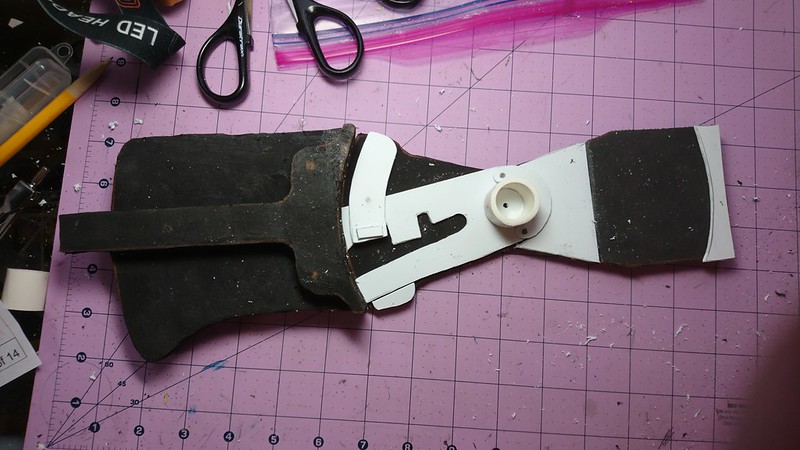
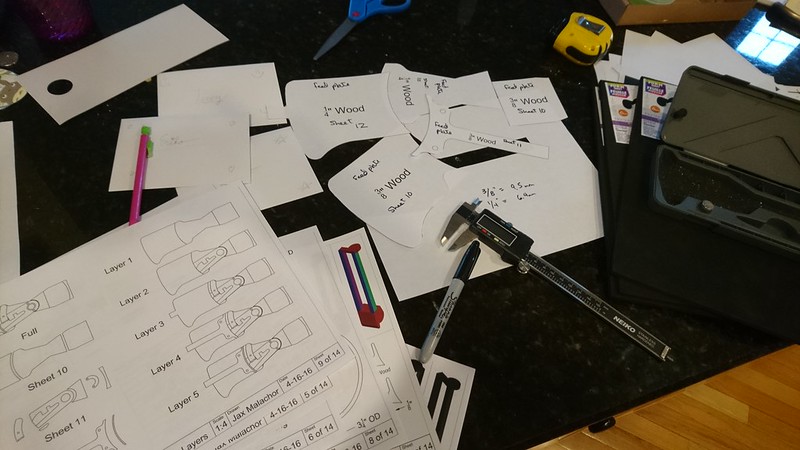
Then I made a few print outs of Jax's (over at the MEPD) Parts Breakdown template.  Instead of making my parts out of wood, I'll cut them out of foam in 3/8" and 1/4" thicknesses.  


I am super excited to get this build going.  Fingers crossed that I can maintain momentum.  

Wednesday, July 26, 2017

Stormtrooper Belt and Ammo Knee Measurements

This graphic helped me a lot to understand where the connections should be made on the knee and belt.  These measurements are not exact- it depends on your armor type to decide exactly where the fasteners should go.  Don't rely on numerical measurements.

29371609356_48d03f596f_b.jpg

Stormtrooper Belt Corners

 I spent two- yes TWO- hours yesterday trying to find the measurements for the corner angles for the TK belt.  I thought I'd bookmarked or noted this info somewhere several months ago, but nooooo.... or it's there and I can't find it.  I feel like Gretel in the forest with my trail of breadcrumbs sometimes.

I finally found it buried in a thread, though.  And I'm reposting it here because I know I'll lose it again somehow.  The corner angles should just meet at the belt.  Not overlapping the belt.
28780565214_2274dd0ca3_z.jpg

Working on joining and gluing the fronts of the thighs and trimming down the belt today.

How to Build Magnetic Closures on Stormtrooper Shins

After being asked a gazillion times about how I built my magnetic shin closures, I've finally compiled everything from my TK build and p...